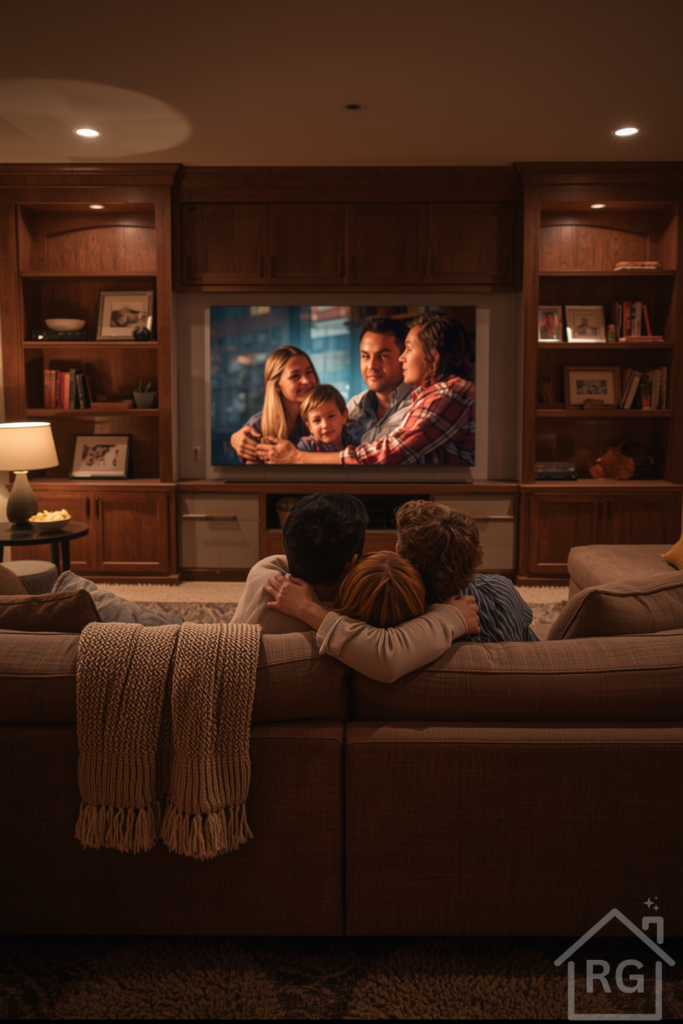
A well-designed TV & media wall does more than hold your screen—it transforms your living space into a focal point for family gatherings, movie nights, and everyday moments. In this guide, we’ll kick off with inspiring real-world examples, then dive into practical advice on storage, materials, lighting, DIY options, installation best practices, and styling tips to help you plan and execute a media wall that’s both beautiful and functional.
Inspiration Gallery: Real-Life TV & Media Walls
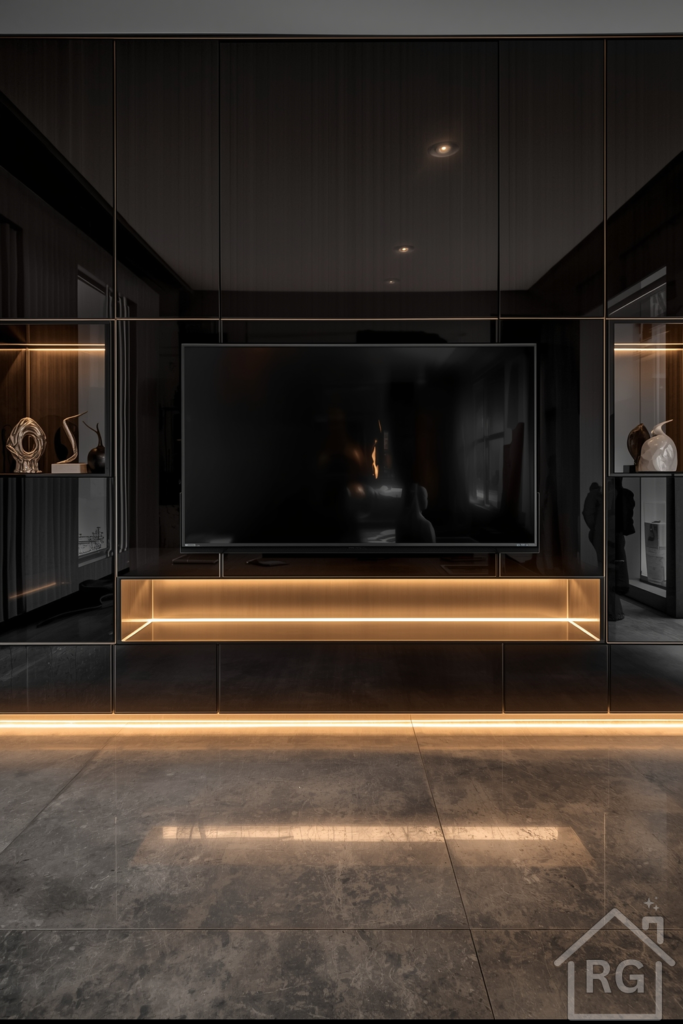
Gallery 1 – Seamlessly Flush-Mounted TV
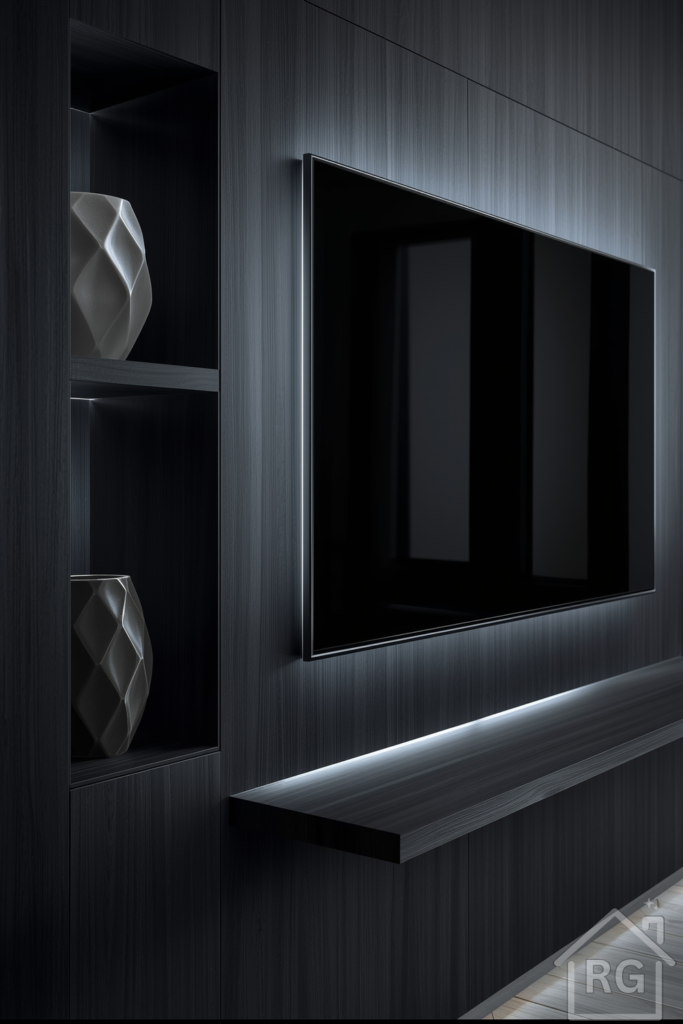
A sleek, wall-mounted TV is integrated into a continuous dark-wood veneer panel, creating a striking monolithic backdrop. Invisible mounting hardware makes the screen appear to hover, while a slim ribbon of cool-white LED backlighting around the perimeter adds subtle depth. To the left, recessed display niches showcase sculptural vases, and a matching floating shelf below provides a clean surface for décor—emphasizing the minimalist, gallery-like aesthetic.
Gallery 2 – Rustic Stone & Reclaimed Wood
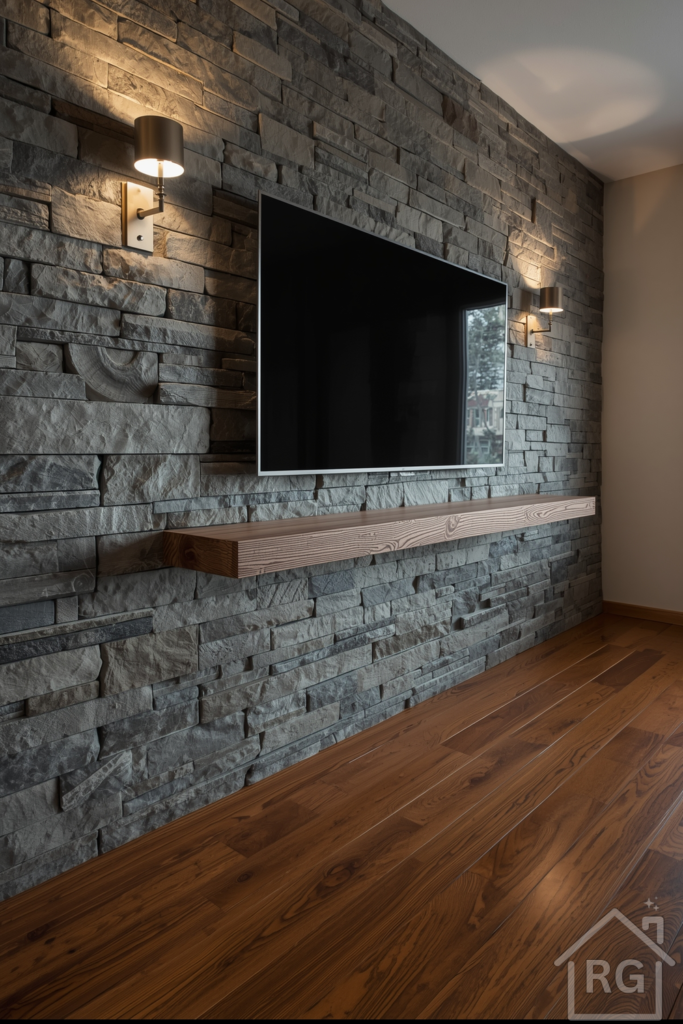
Floor-to-ceiling slate veneer meets a chunky reclaimed-wood mantel shelf in this cozy setup. Warm uplighting from vintage sconces highlights the stone’s texture, while the hardwood floor and soft textiles add warmth and charm.
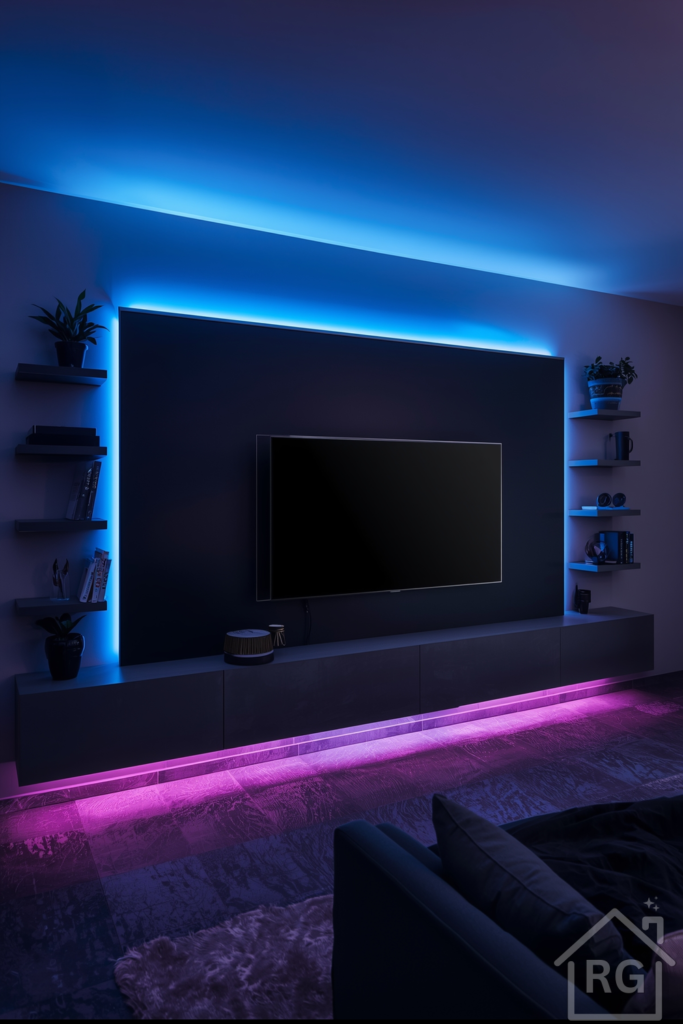
Gallery 3 – Sleek Lacquer & Linear LEDs
High-gloss charcoal panels reflect ambient light, and a narrow LED strip beneath the TV provides a subtle glow. Minimalist niches display sculptural accents, and the polished-concrete floor completes the modern, editorial look.
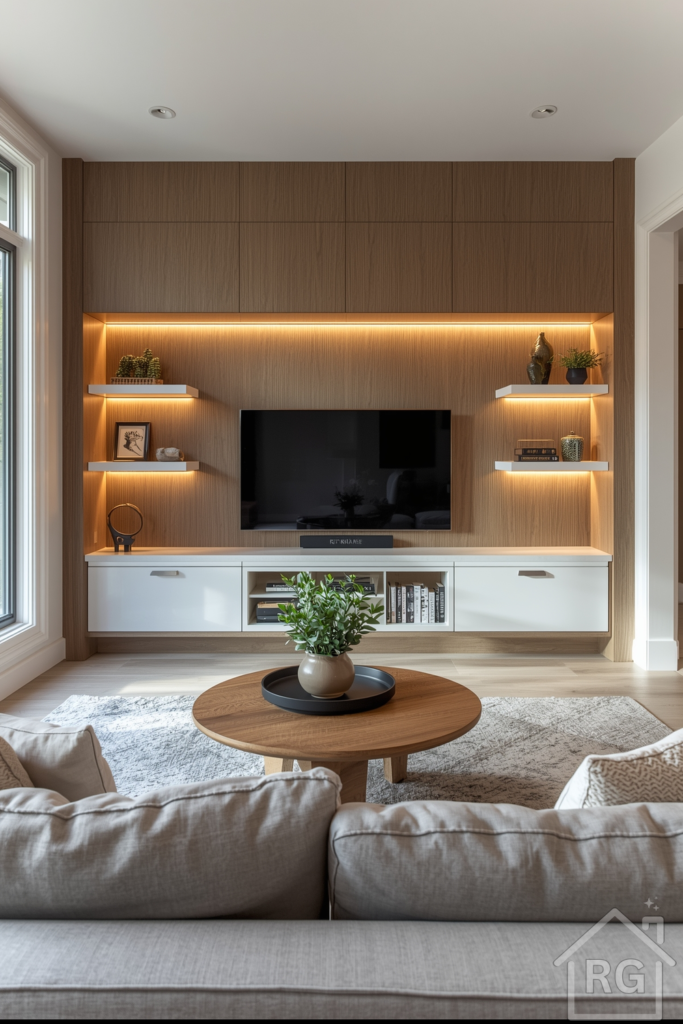
Storage & Display
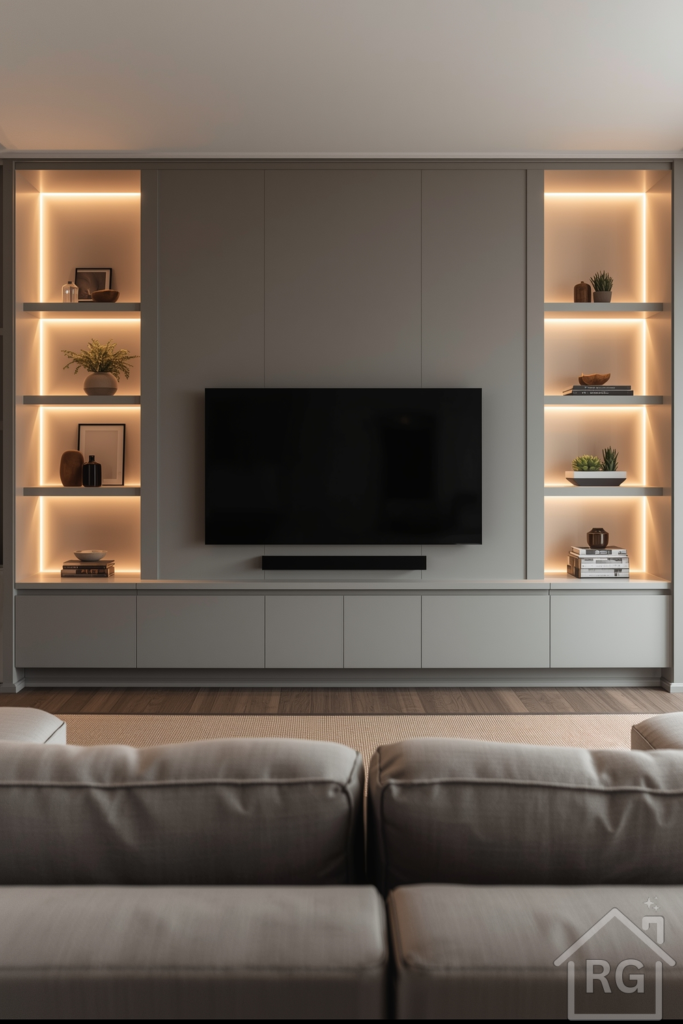
Built-In Cabinetry
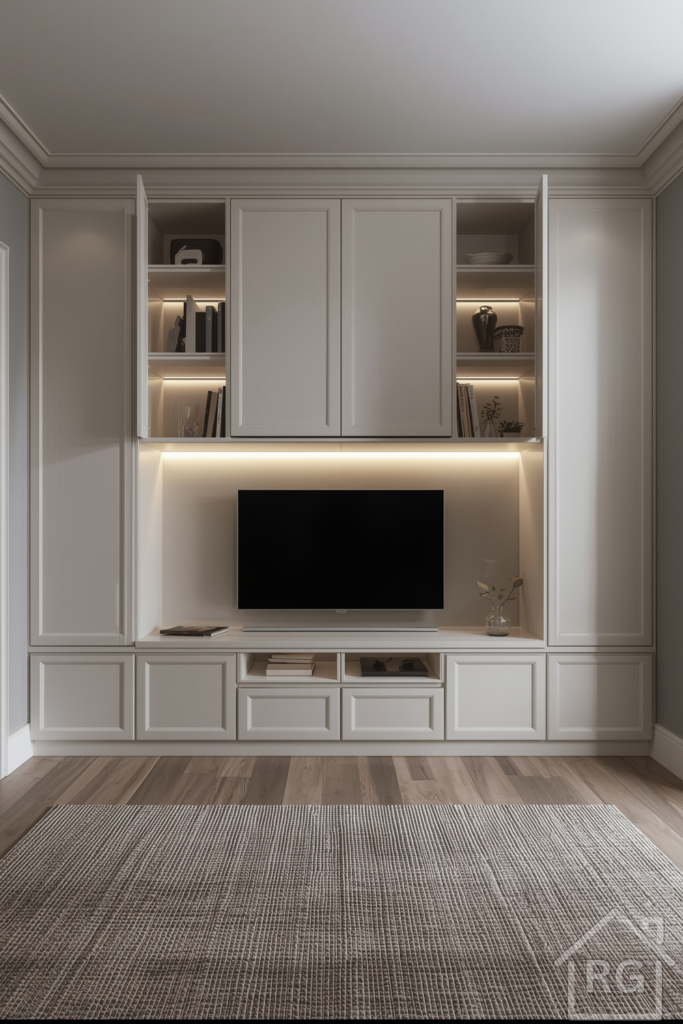
Floor-to-ceiling cabinetry conceals wiring, remotes, and AV gear. Push-to-open doors below the TV keep clutter hidden, while under-shelf LED strips illuminate display niches—perfect for books, art, or family photos.
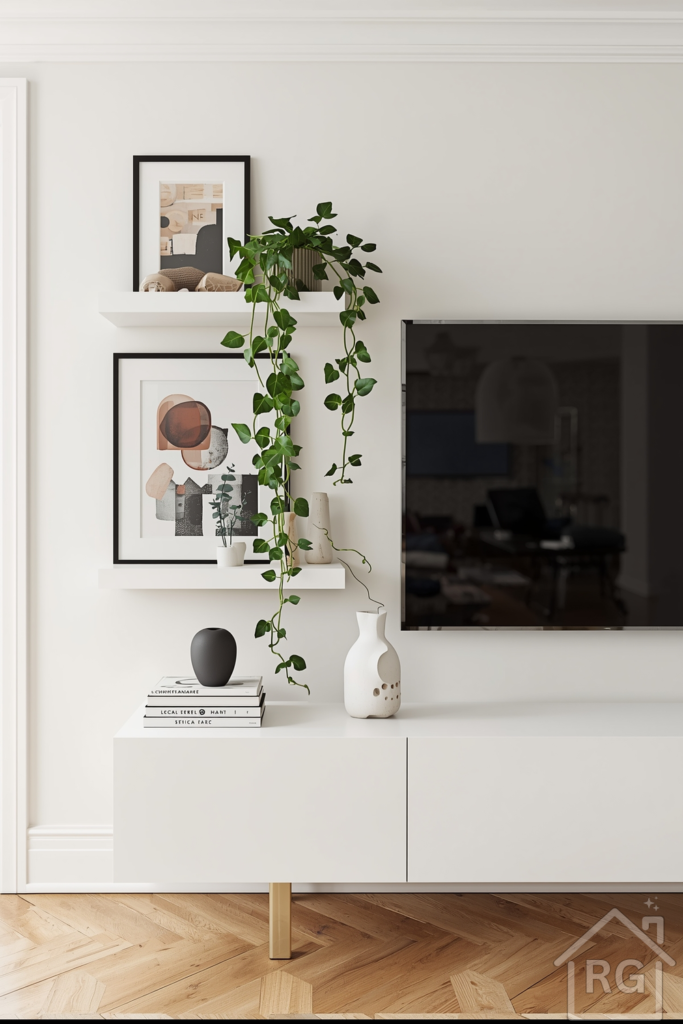
Floating Shelves
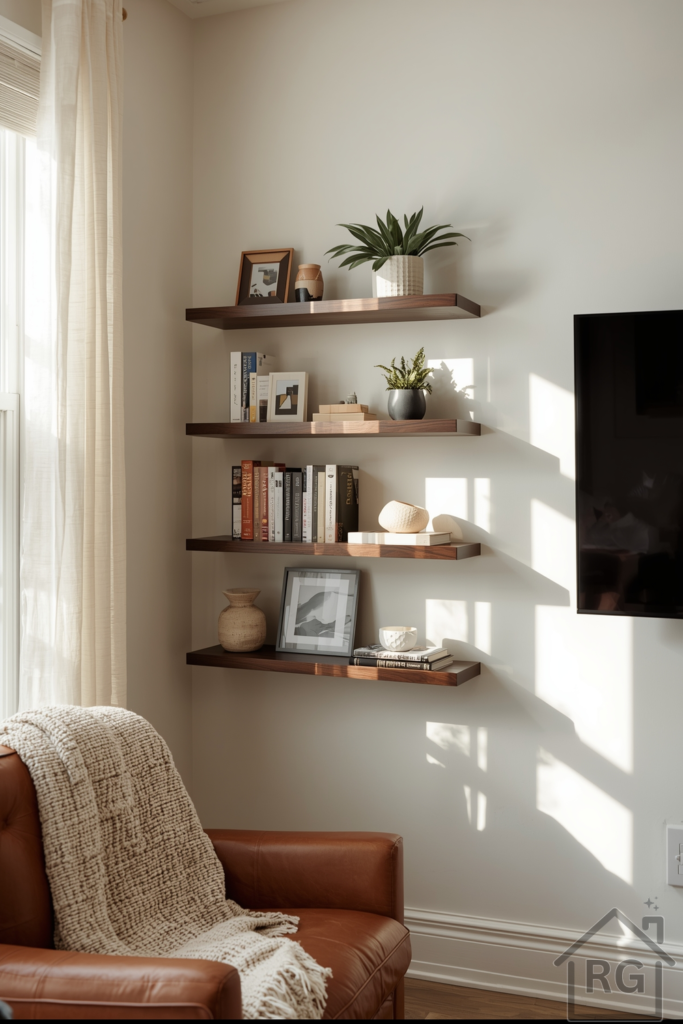
Floating walnut shelves frame your screen, offering flexible display space for plants, books, and décor. Natural light highlights the wood grain, and the open design keeps the room feeling airy.
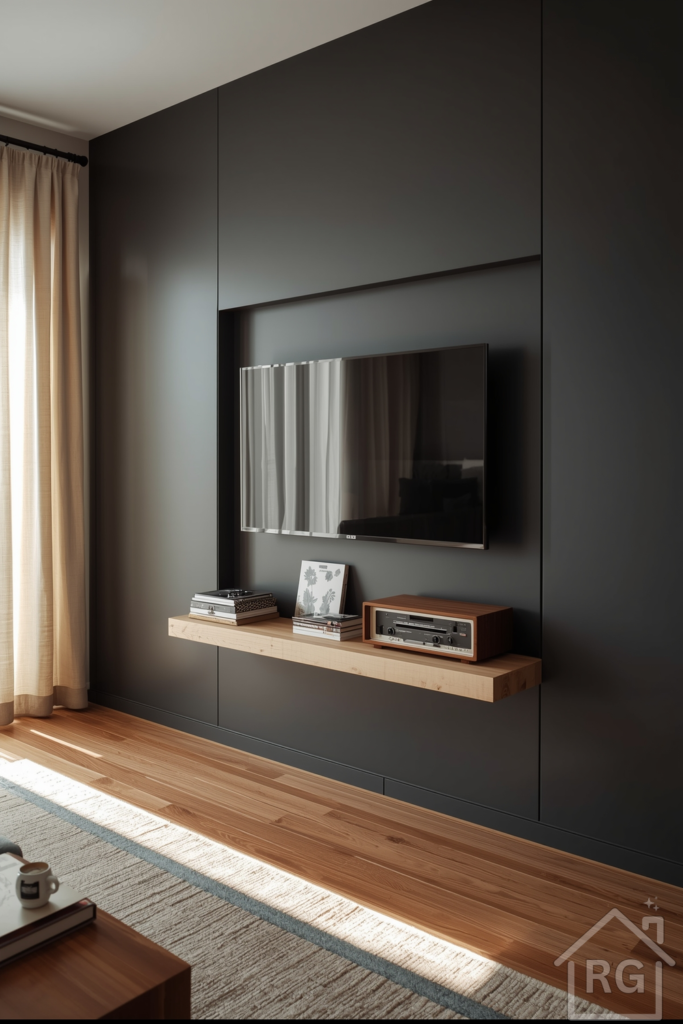
Surface & Ambience
Accent Wall Materials
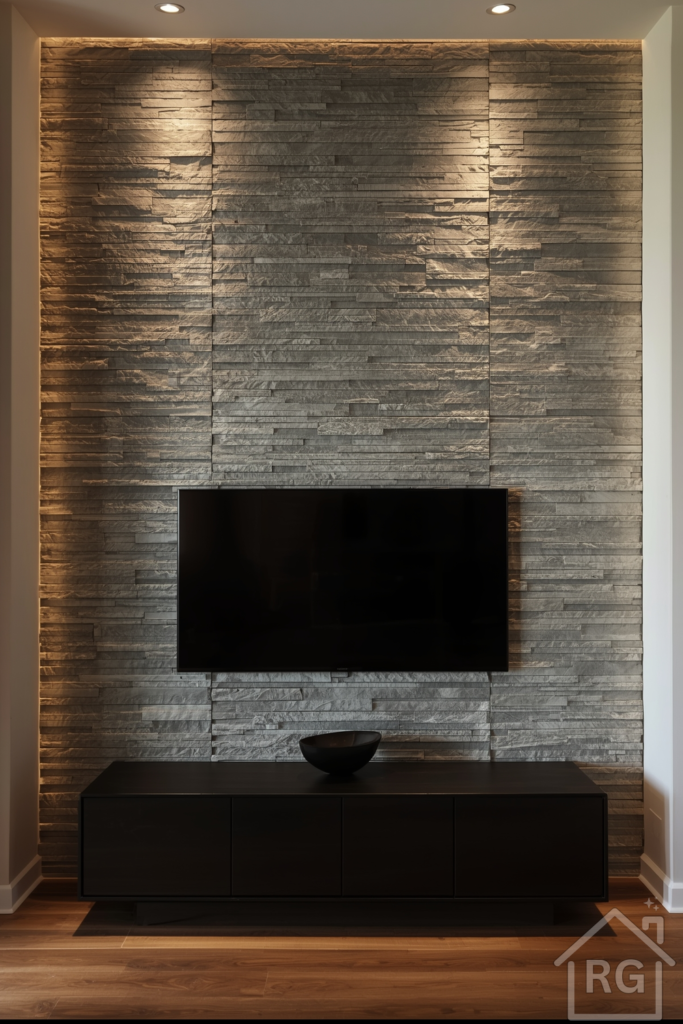
Choose a textured material—stone, brick, or wood veneer—to add depth and character. In this example, a gray stone backdrop anchors the TV and creates a dramatic focal point, softened by gauzy curtains and a neutral media console.
Integrated Lighting Effects
Concealed LED strips can shift from warm white for movie nights to colorful hues for entertaining. Tuck them behind panels or shelves to wash the wall in light without exposing fixtures.
DIY & Budget Builds
You don’t need custom millwork to make a statement. Large plywood panels painted in matte charcoal mimic high-end finishes, while groove-cut joints hide cables. Add simple pine shelves and you’ve got a high-impact look on a modest budget.
Mounting & Cable Management
- Secure Mounting: Use a mount rated for your TV’s weight—an articulating arm adds flexibility.
- In-Wall Power: Install a recessed outlet behind the TV to eliminate visible cords.
- Concealed Cabling: Route HDMI and power cables through routed channels or UL-rated in-wall kits.
- Safety & Code: Always power down before cutting into walls and consult a professional if you’re unsure.
Styling Your Media Wall
Once installation is complete, layer in personality:
- Artwork & Frames: Lean framed prints against shelves for a casual vibe.
- Greenery: Add trailing plants or succulents to soften hard edges.
- Sculptural Pieces: Introduce varied textures—ceramic vases, woven baskets, metal accents.
- Balance: Mix heights and materials, keeping symmetry loose for an organic feel.
Room Makeover Checklist
- Measure & Plan: Wall dimensions, stud locations, and viewing distance.
- Choose Storage: Cabinetry vs. shelving based on gear and décor needs.
- Select Materials: Paint, veneer, stone, or plywood finishes.
- Map Lighting: Ambient uplights, backlighting zones, and accent lamps.
- Design Cable Paths: Power source and in-wall routing.
- Install Hardware: Mount bracket, panels, and wiring before styling.
- Style & Accessorize: Art, plants, books, and personal mementos.
Conclusion
Designing a TV & media wall is a rewarding project that elevates both form and function. With inspiration in hand and these step-by-step guidelines, you’re ready to transform your living room into a stunning centerpiece. For deeper how-tos, detailed material guides, and more real-world examples, visit RoomGenAI.com.
Happy designing!